8 Strategies for Taking a Great Product Photo
First impressions in eCommerce are almost always visual, and your product photos are doing all the talking before your copy even has a chance.
A crisp shot with natural light, a clean background, and the right angles can instantly signal quality, professionalism, and trustworthiness.
On the flip side, low-quality product photography with poor lighting or sloppy composition can drive shoppers away before they even scroll.
Whether you're working with a DSLR, smartphone, tripod, or softbox, the visual presentation of your merch matters.
In this guide, we'll break down eight essential strategies for taking great product photos. Plus, we'll also share insightful tips on how to optimize your images for SEO so they not only look good, but help your store rank higher and sell more.
Tools You Need to Shoot Product Photos at Home
Before you start snapping away, make sure you’ve got the right tools in your corner.
While you don’t need a full-blown studio or a professional photographer on speed dial, having the essentials makes a massive difference in how polished (and profitable) your product photos turn out.
The right gear will help you control lighting, reduce shadows, capture sharper images, and create a consistent visual style across your entire eCommerce shop.
📸 Smartphone or DSLR Camera
You don’t need the latest Canon or Nikon to shoot great product images.
Today’s smartphones are packed with high-quality lenses and built-in editing tools that rival entry-level DSLRs.
That said, if you do have access to a DSLR or mirrorless camera, it gives you more control over depth of field, shutter speed, and ISO for those buttery-smooth, high-resolution shots.
It doesn’t matter you’re working with a Google Pixel, iPhone Pro, or a Sony Alpha; the key is learning your camera settings and practicing your angles.
🦿 Tripod or Stable Surface
A tripod is a must-have for keeping your product photography steady, especially if you're shooting in low light or need a consistent frame for multiple angles.
Even a $20 tabletop tripod can prevent shaky shots that make your images look unprofessional.
If you don’t have one yet, prop your phone or camera on a stack of books or a sturdy box to create a makeshift stable setup.
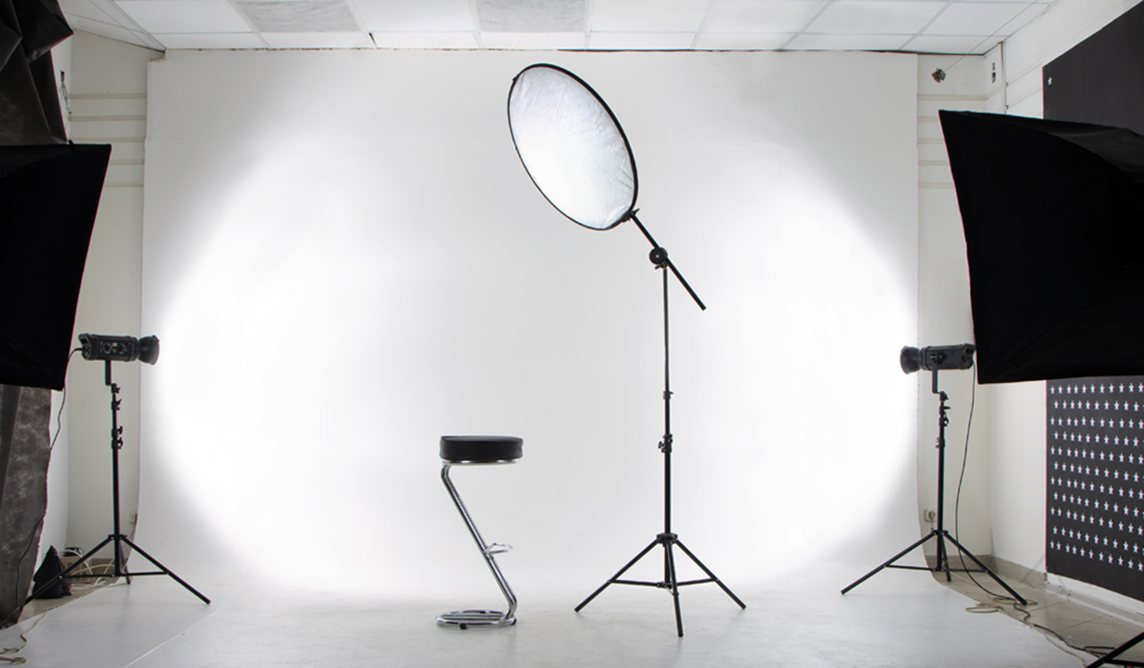
💡 Softbox Lights or Indirect Natural Light
Lighting is everything in product photography.
If you're shooting indoors, a pair of softbox lights (like the Neewer 700W kit) will give you a reliable light source that mimics natural daylight while softening harsh shadows.
However, if you’re on a budget, set up your shoot near a large window during golden hour and use a white sheet or sheer curtain as a diffuser to create that soft light look without the studio setup.
🎨 Clean Backdrop (White Paper Roll, Foam Board, or Cloth)
A clean, distraction-free background ensures your product stays center stage.
A white background, whether it’s a seamless paper roll, vinyl sheet, or foam board, makes editing and photo retouching easier and helps your product pop.
Want a little color? Colored backgrounds, such as pastel poster boards or light wood textures, can help establish your brand’s vibe without overwhelming the shot.
🧺 Props for Lifestyle Shots (Optional but Powerful)
Props aren’t just for aesthetics—they add story and context.
Consider pairing coffee mugs with your custom tote bags, sunglasses with branded tees, or a laptop with your sticker set.
Just make sure the props enhance the product, not distract from it. A well-styled lifestyle shot can instantly elevate your product photos from simple to scroll-stopping.
🛠 Free Editing Apps (Lightroom, Adobe Express, or VSCO)
After the shoot comes the polish.
Lightroom is perfect for fine-tuning exposure, shadows, and color balance, while Adobe Express offers quick edits and background removal. VSCO is great for styling with subtle presets if you want a more curated aesthetic. With just a few tweaks, your product images can go from “meh” to marketplace-ready—no Photoshop wizardry required.
Bottom line: Having any of these tools on hand not only makes your life easier, but also ensures you’re capturing product photos that build trust, showcase quality, and help your merch sell.
How to Take Great Product Photos: 8 Pro Strategies
Once you’ve got your setup in place, it’s time to focus on how you shoot.
For any seller, the way you light, frame, and edit your product photos can make or break how your merch is perceived online.
These eight proven strategies will help you create product photography that not only looks professional but also drives engagement and sales.
1. Use Natural Lighting or a Softbox
Good lighting is the difference between “meh” and wow!
It separates amateur-looking photos from professional ones by clearly showcasing your product’s details and textures, creating a clean, polished look that’ll capture your buyers' interest in your goods.
Whether you're using sunlight or studio lighting, here are some easy ways to get the best lighting setup:
✅ Natural Lighting Tips:
- Shoot near a large window with lots of indirect sunlight. This creates a soft, flattering glow that reduces harsh shadows.
- Avoid direct sunlight, which can cause blown-out highlights, harsh contrast, and unwanted color shifts.
- Use the golden hour (early morning or late afternoon) for warm, even light that looks great on most products, especially apparel or accessories.
- Diffuse strong sunlight with a sheer white curtain, a thin bed sheet, parchment paper, or wax paper taped over the window to soften the light.
- Bounce light back onto the product using a white foam board, poster board, or a 5-in-1 reflector. This helps eliminate dark shadows and creates a more balanced look.
- Add warmth or brightness with gold or silver reflectors (gold for a warmer tone, silver for bright and crisp highlights).
✅ Artificial Lighting Tools (When Natural Light Isn’t an Option):
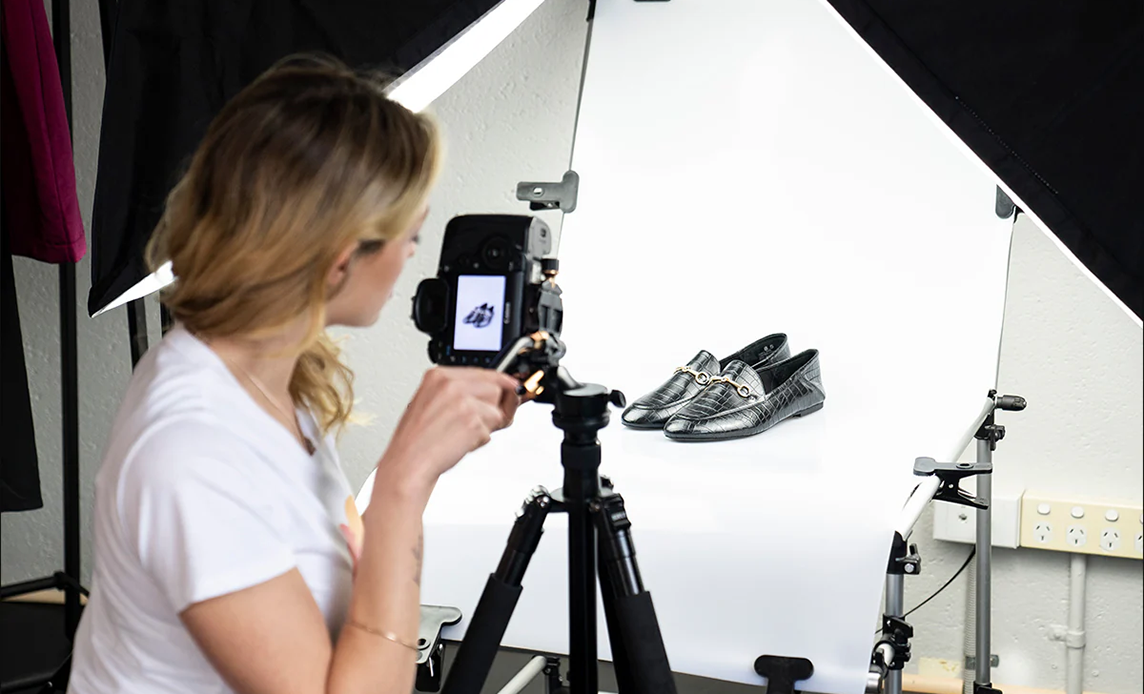
- Use softbox lighting kits like the Neewer 700W, Mountdog Softbox Kit, or EMART LED Softbox Set. These mimic natural daylight and allow for complete control over your lighting environment.
- Set one softbox at a 45-degree angle to your product to act as the key light, and place a second light or reflector opposite it to act as a fill.
- Combine your lighting setup with a white background to maintain a clean, professional look and reduce editing time later.
- Use a tripod to lock in your framing and eliminate any camera shake. This is perfect for long exposure or low-light conditions.
🌟 Pro Tip: Even if you're using artificial light, try to keep your color temperature consistent. Mixing warm indoor bulbs with cool daylight can make editing harder and throw off the look of your product photos.
2. Choose a Clean, Non-Distracting Background
A messy, cluttered, or overly busy backdrop can make your photos look unprofessional and distract shoppers from what actually matters: your product.
Keeping your background clean and minimal can create a focused, polished image that not only highlights your merch but also makes it easier for buyers to visualize it in their own lives.
Here’s what you should do when setting up your background:
- White backgrounds are a go-to for a reason. They’re clean, timeless, and ideal for marketplaces that require simple, distraction-free product shots. They also reflect light evenly, reduce shadows, and make photo editing and color correction a breeze.
- You don’t need a full studio setup to get started—just grab a foam board, white poster board, or a roll of seamless paper and tape it to a wall or chair to create an easy DIY backdrop. Curve it naturally onto a table for that smooth, infinite-background look.
- For lifestyle shots, choose a setting that matches your brand aesthetic. A well-lit desk, a neutral-toned bedspread, or a textured surface like linen or reclaimed wood can add warmth and personality to your product photography. Just make sure it enhances, not competes with, the item you’re showcasing.
- Want to go beyond white? Colored backgrounds can work beautifully—as long as they match your brand and don’t distract. Try soft pastels, monochrome tones, or even a branded color that ties into your packaging or website for a more cohesive feel.
Remember, the goal is to let your product do all the talking.
A clean background doesn’t just look better; it improves image clarity and helps you create a store that looks thoughtfully designed from top to bottom.
3. Shoot Multiple Angles
Since shoppers can’t physically touch or inspect your product, your photos need to show every possible detail to help them feel confident about buying.
That means going beyond just a single front-facing shot and capturing your product from several strategic angles.

Here are the most effective types of product photography angles to include:
- Eye-Level – This straight-on view is the most natural and familiar, showing the product as a customer would see it on a shelf or in use.
- High Angle – Taken from slightly above, this view helps highlight surface details or the top of an item, especially for products like mugs or accessories.
- Low Angle – A shot from below creates a dramatic and powerful feel, great for making items like shoes or apparel appear bold and stylish.
- Bird’s Eye – Captured directly from above, this flat-lay style is perfect for showing layout, bundling items, or shooting lifestyle scenes.
- Slanted (Three-Quarter View) – Taken from one side at an angle, this view gives depth and dimension to the product and is great for showing off shape or structure.
- Close-Up – Zoom in on fine textures, stitching, or unique features like tags or patterns. Ideal for apparel, tech accessories, and anything custom.
- Reference/Contextual – Place your product next to a hand, a common object, or in an in-use scene to provide scale and usability context.
Combining multiple angles in your product photography not only builds trust but also reduces the chances of customer uncertainty or returns. Think of it as giving your merch a 360° showcase, no spinning viewer required.
4. Keep Your Camera Steady
Sharpness is everything in product photography. It shows off details, textures, and product quality.
Even if your lighting and setup are on point, a shaky hand can ruin an otherwise perfect shot and make your product look low-quality.
The easiest way to prevent blur is to use a tripod.
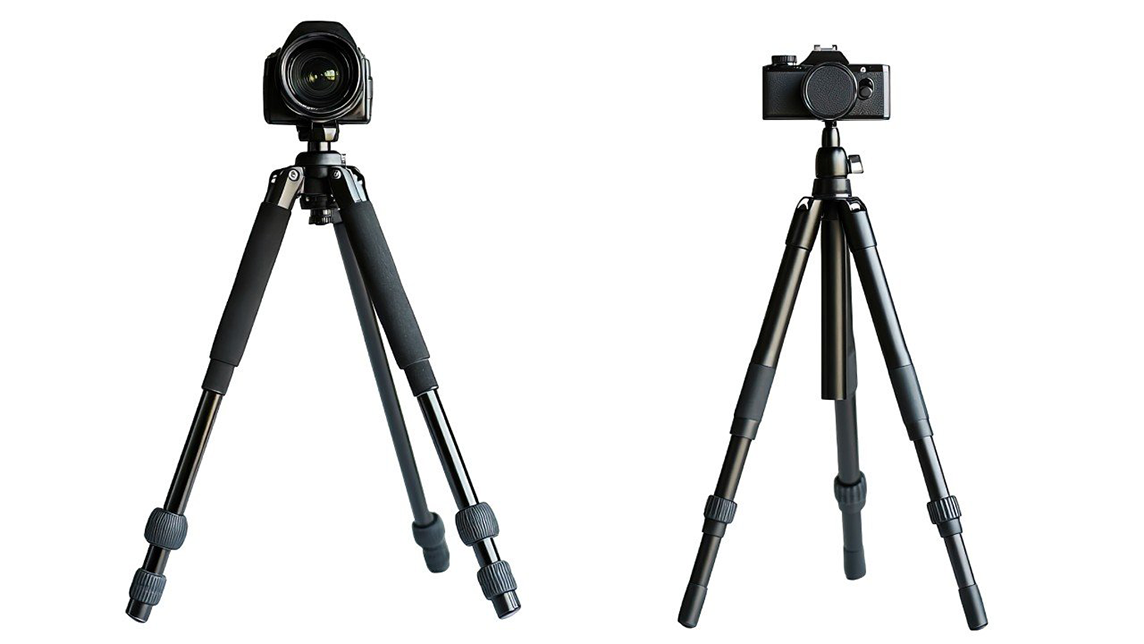
Tripods stabilize your camera or smartphone, keep your framing consistent, and allow you to shoot from multiple angles without having to readjust your position each time.
They also provide more flexibility with your shutter speed, especially in low-light conditions where longer exposures are needed.
The best part? They’re actually pretty affordable!
Budget-friendly tripods like the UBeesize Phone Tripod, JOBY GorillaPod, or Amazon Basics Lightweight Tripod range from $10-$30 and work great for smaller setups and home use.
Just make sure your tripod allows for height adjustments and tilting so you can shoot eye-level, overhead, or angled shots with ease.
5. Use the Right Camera Settings
You don’t have to be a professional product photographer to get crisp, clean shots. But knowing how to adjust a few key settings can make a massive difference in image quality.
Whether you're using a DSLR, mirrorless camera, or smartphone, these tweaks can help you get the most out of your gear.

- Shoot at the highest resolution your device allows. This gives you more flexibility when cropping or editing your product images later without losing quality.
- Turn off the flash. Built-in flashes often produce harsh, uneven lighting and can cause unflattering reflections or blown-out highlights. Instead, rely on natural light or a controlled soft light source like a softbox.
- Keep your ISO low, ideally around 100–200. A higher ISO can introduce grain or noise, especially in low-light conditions, which makes your product images look less sharp and professional.
- If you're using a DSLR or mirrorless camera, shoot in Aperture Priority (A or Av mode). Stick with an aperture between f/2.8 to f/5.6 to achieve a shallow depth of field that blurs the background while keeping your product in sharp focus.
- Pay attention to white balance to avoid color shifts. Use auto white balance in consistent lighting or manually adjust it if you're working with mixed light sources.
- For smartphone cameras, tap and lock focus and exposure on your product before shooting. This ensures the subject stays well-lit and sharp, even if your hand shifts slightly or lighting changes mid-shot.
- If your phone supports Pro Mode or Manual Mode, experiment with adjusting shutter speed, ISO, and exposure manually to fine-tune your shot just like you would with a DSLR.
Taking a few test shots before committing to a whole batch can help you catch any overexposure, color imbalances, or blurry details early.
This will save you time in post-production while helping you deliver professional-looking product photos with minimal editing.
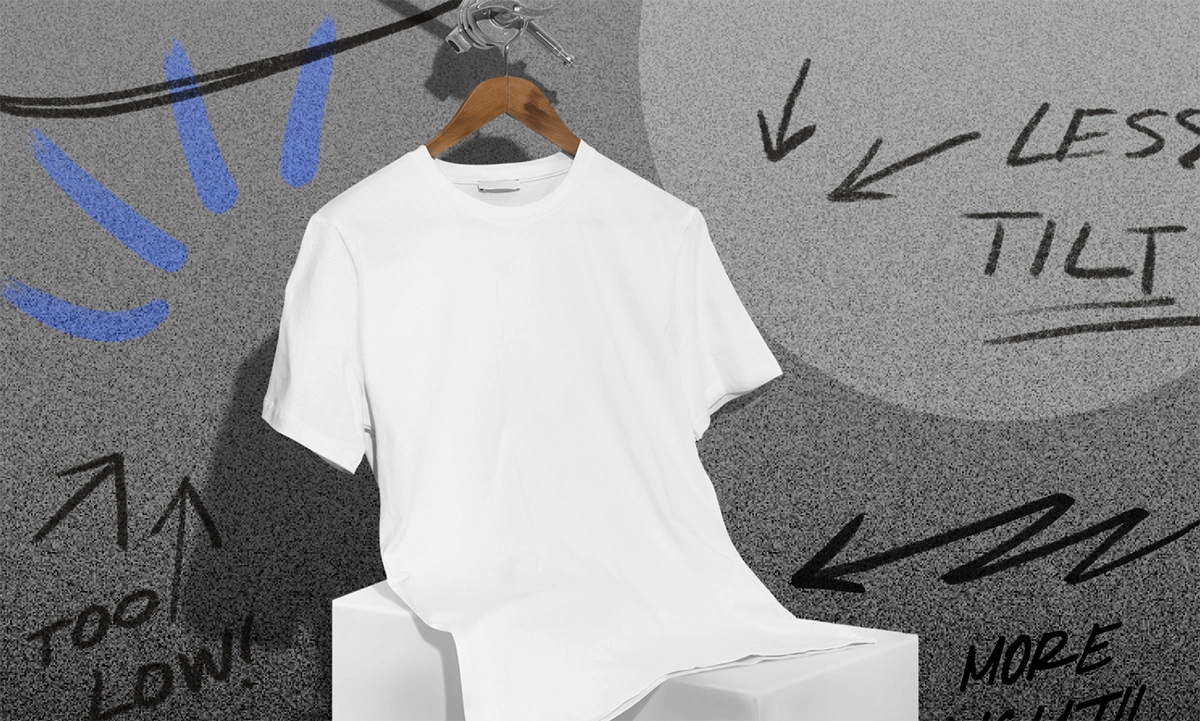
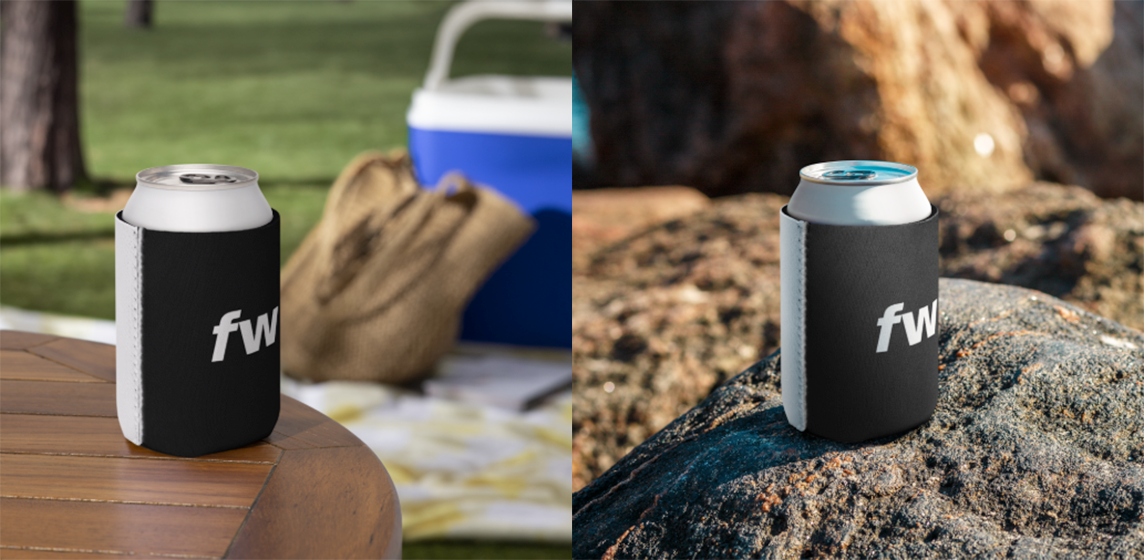
6. Stay Consistent with Framing and Style
Consistency is key when it comes to building a recognizable and trustworthy brand.
Using the same background, lighting setup, and image dimensions across all your product photos helps create a polished and cohesive storefront. Especially on eCommerce platforms where your product grid is the first thing shoppers see.
A clean, uniform visual style makes your store feel curated and professional, even if you’re shooting from your bedroom or a home setup.
If you’re mixing different types of product photography, like flat lays, close-ups, and lifestyle shots, keep a few elements consistent to tie them all together:
- Stick to a single color palette that reflects your brand (e.g., warm neutrals, bold primaries, or muted tones).
- Use similar light sources (natural light vs softbox) to maintain the same color temperature and avoid jarring shifts in tone.
- Choose 2–3 go-to camera angles (like eye-level and bird’s eye) and repeat them across products to create visual rhythm.
- Apply the same photo editing style or Lightroom preset to every shot to keep your images feeling cohesive, even when the setting changes.
- If you're showcasing products in real-world scenes, try using consistent props or a signature background texture (like linen, wood grain, or marble) that your audience can start to associate with your brand.
Tools like Canva’s Brand Kit, Lightroom mobile presets, or even Photoshop actions make it easy to apply a uniform editing style without starting from scratch each time.
Over time, this visual consistency will not only help you build brand recognition but also allow shoppers to focus on your merch instead of your layout.
7. Edit, But Don’t Overdo It
Editing should enhance the quality of your product photography, not mislead your customers.
The goal is to make your product images look clean, vibrant, and professional while staying true to the actual item.
Over-editing with dramatic filters or color shifts can distort how your product looks and lead to disappointed buyers (and more returns). Think of editing as polishing your image, not reinventing it.
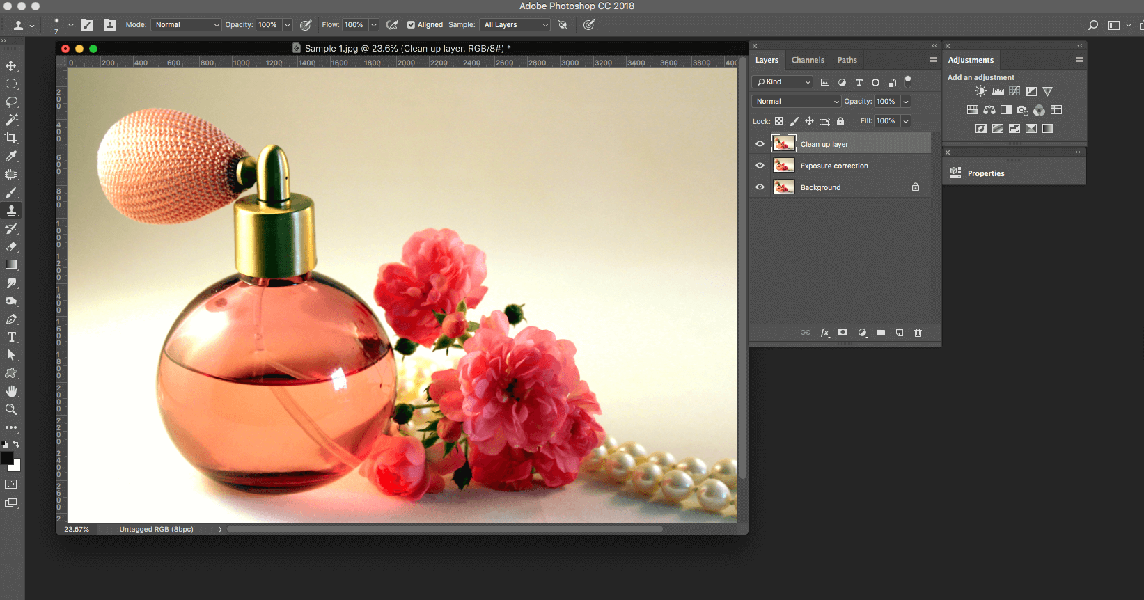
- Start with basic adjustments like brightness, contrast, white balance, and sharpness. These minor tweaks can help your product stand out without looking fake or overly processed.
- Use trusted photo editing apps like Lightroom, Photoshop, or Snapseed. Lightroom is excellent for fine-tuning exposure and color tones, while Photoshop offers more advanced tools like content-aware fill or precise retouching. Snapseed is a solid mobile-friendly option with quick-fix features and filters that won’t overdo it.
- Stick to natural-looking edits. If your product is light blue in real life, it shouldn’t look turquoise in the photo. Always compare your edited version to the physical product under similar lighting to ensure accuracy.
- Clean up the details: remove stray threads, dust particles, or small blemishes using the spot healing or clone tools. These tiny distractions can make your product appear lower in quality than it really is.
- Maintain editing consistency across all your product images by using saved presets or filters. This keeps your brand’s visual identity cohesive and makes your store look more polished and professional.
🌟 Pro tip: After editing, preview your product photos on both desktop and mobile. What looks great on a big screen might not translate well on a smaller one, so make sure your edits hold up across all devices.
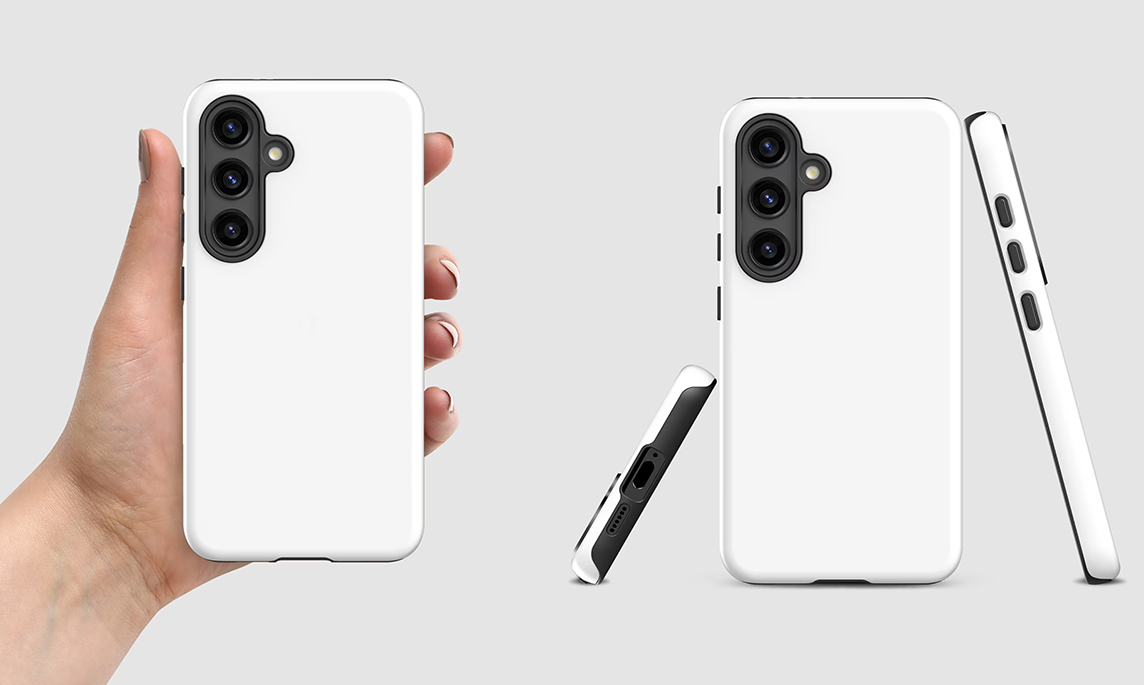
8. Include Scale or Context When Needed
Sometimes even the best product photography can fall flat if customers can’t tell how big or small your item really is.
For merch like tote bags, mugs, or phone cases, including a sense of scale is crucial for setting the right expectations.
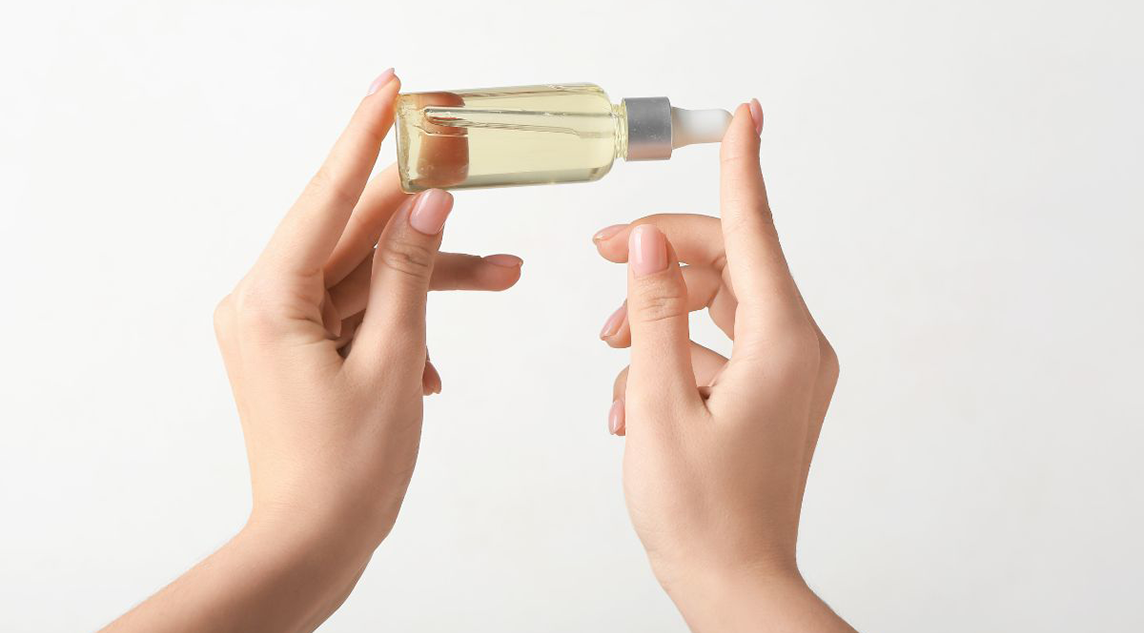
Try shooting your product in someone’s hands or next to an everyday object like a laptop or water bottle. You can even style it in a real-world setting to help shoppers visualize how it fits into their daily life.
These contextual product photos not only boost clarity but also add authenticity to your eCommerce store, especially when paired with natural light, soft shadows, and a clean background.
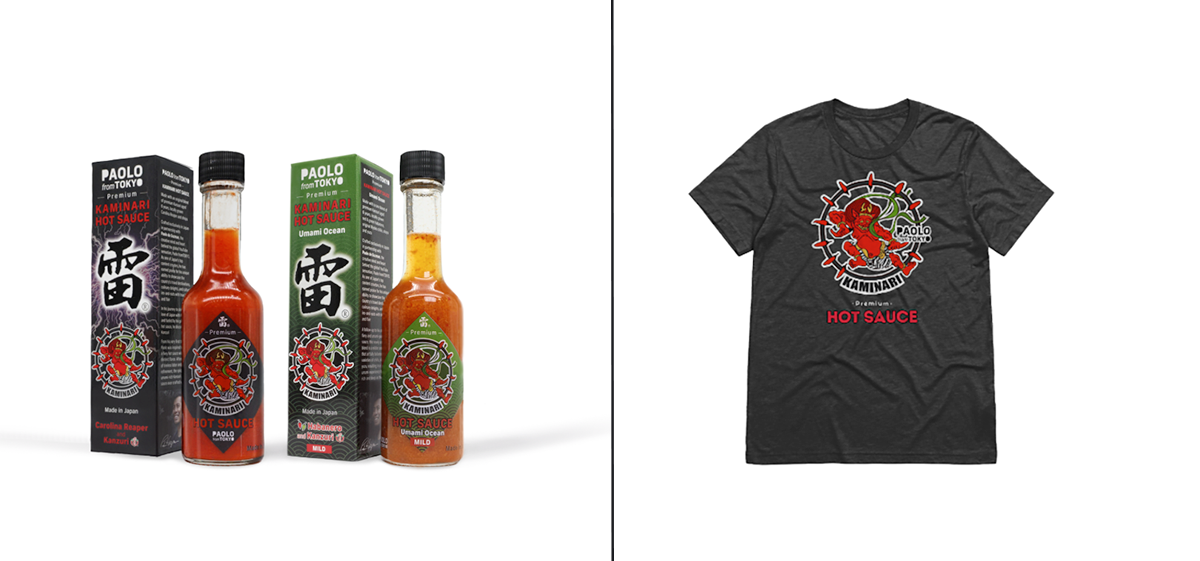
Bonus: Use Fourthwall’s 3D Rendering for Instant Mockups
Don’t want to set up a whole shoot every time you drop new merch? Fourthwall’s got your back.
Our 3D rendering technology delivers photorealistic mockups as soon as you upload your design. No camera, lighting setup, or editing software required.
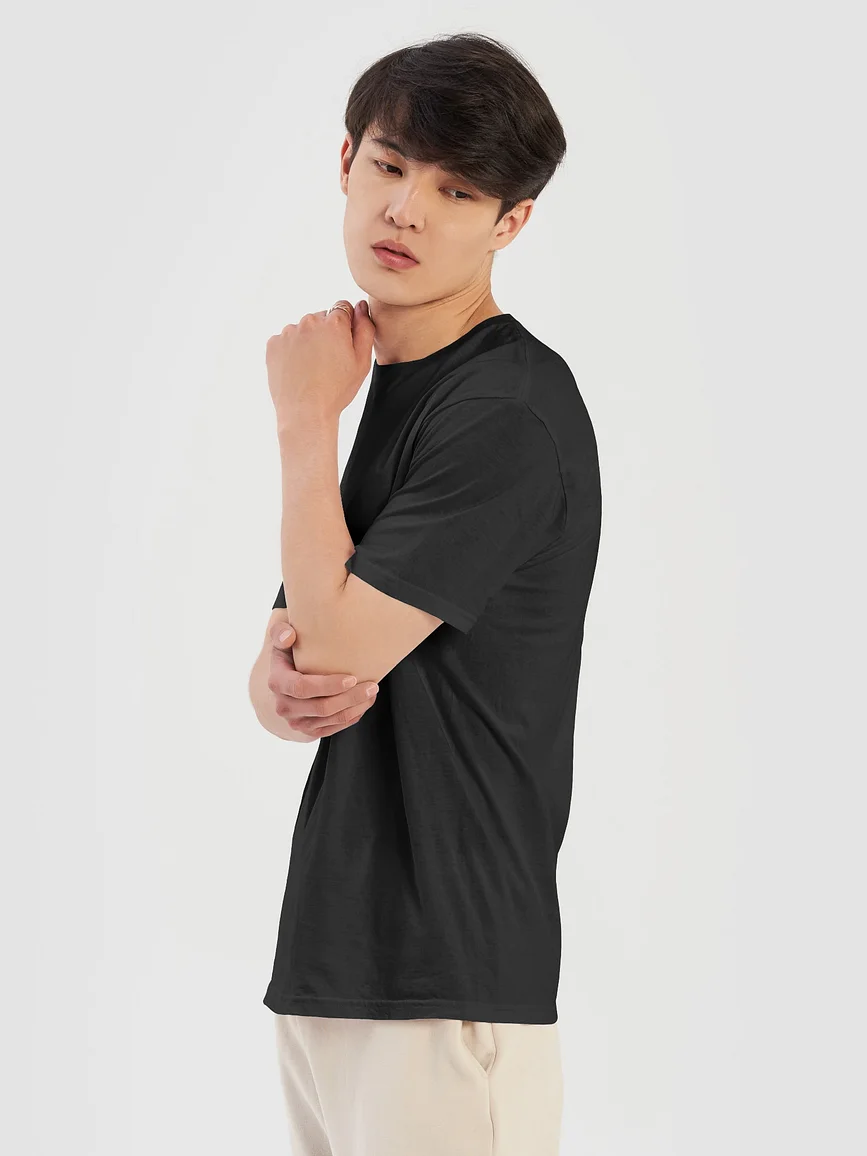
From clean flat lay shots to high-quality model photography that showcases your merch on real people, Fourthwall also offers realistic product placement options, so your hoodie, t-shirt, tote bag, or phone case looks like it’s already part of someone’s life.
Want to see your design on a model in a cozy indoor scene? Or displayed on a clean white background, ready for your eCommerce site? It’s all handled in just a few clicks.
This tool is perfect for creators who want to:
- Launch new products faster
- Maintain a polished, consistent brand aesthetic
- Skip the hassle of shooting and editing product photos from scratch
Whether you’re just starting your store or scaling your merch line, Fourthwall’s mockups give you professional-grade visuals that help.
How to Optimize Your Images for Online Stores
In an oversaturated eCommerce market of custom consumer products, high-resolution photos are essential for showcasing your merchandise. And if your images take too long to load, your visitor likely won't stick around.
That’s why image optimization is just as important as good product photography.
If you want your images to be crisp, clean, and fast-loading across all devices, start by compressing your images with tools like TinyPNG or Squoosh.
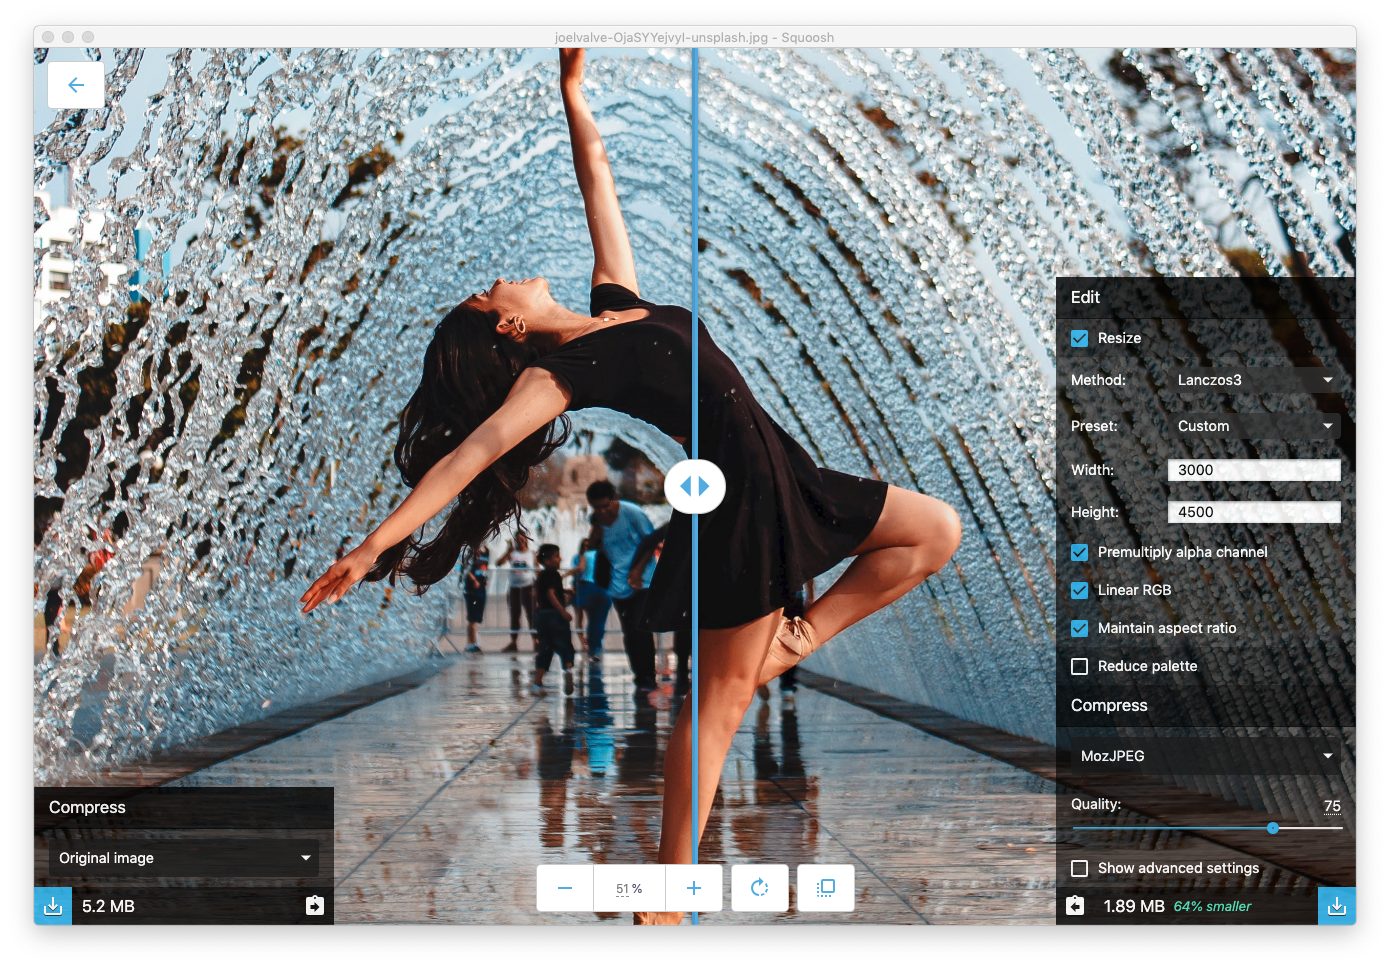
These reduce file size without sacrificing quality, helping your eCommerce pages load faster while keeping your product images looking sharp.
For most product shots, stick with JPEG format, which balances high-quality visuals with smaller file sizes. Use PNG only for logos or graphics that require transparent backgrounds.
Next, crop your images to the exact dimensions your storefront uses. Whether you're working with a grid layout or a full-width banner, properly sized images prevent awkward stretching, misalignment, and unnecessary loading of oversized files.
Use a white background or consistent colored backgrounds across your product line to keep things looking clean and professional.
And don’t forget the behind-the-scenes SEO work. Rename every file with relevant, keyword-rich filenames before uploading.
For instance, instead of something generic like IMG_3728.jpg, go with something descriptive like black-cotton-hoodie-front-view.jpg or custom-mug-on-desk-lifestyle-shot.jpg.
This will make your images more discoverable in search engines and help boost your organic visibility over time.
By optimizing your photos for both aesthetics and performance, you’ll improve the customer experience, reduce bounce rates, and give your store the edge it needs to actually sell.
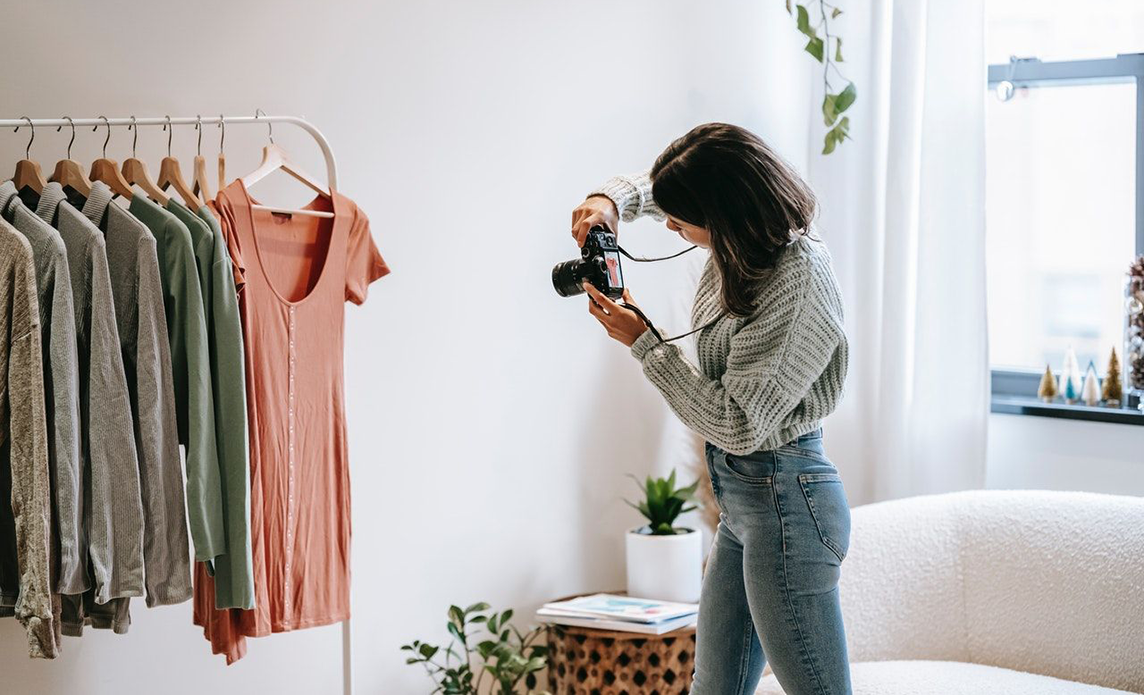
Tips for Shooting with a Smartphone
You don’t need a DSLR to create eye-catching, high-converting product photos.
Most modern smartphones have powerful cameras that, when used right, can rival professional setups.
Here are a few photography tips to help you shoot merch like a pro using just your phone:
📷 Use the Rear Camera for Better Quality
The rear camera on your phone has a higher megapixel count and better sensors compared to the front-facing one.
This means you’ll get sharper product images, more accurate colors, and more depth, which is essential for eCommerce product photography that sells.
🔒 Lock Focus and Exposure Before Shooting
Tap and hold on your product to lock the focus and exposure.
This ensures the subject stays sharp and well-lit, even if the lighting changes or you slightly move your phone.
It’s a quick trick that makes a big difference in the clarity of your shots.
⚡️ Turn Off Flash
The built-in flash on smartphones is often too harsh, casting unnatural shadows and blowing out highlights.
Stick to natural light or a soft light source like a ring light or softbox for more flattering, evenly lit product photos.
If you're indoors, use a reflector or white foam board to bounce light and reduce shadows.
📸 Tap into Portrait Mode for Lifestyle Shots
Portrait mode can create a shallow depth of field effect that blurs the background slightly while keeping your product in focus.
It’s perfect for lifestyle shots with props, soft light, and a clean setup. Just make sure your phone doesn’t blur essential details on the product itself.
🧼 Clean the Lens (Seriously)
It might sound obvious, but a smudged lens can ruin even the best lighting setup. Before every shoot, wipe your lens with a microfiber cloth to remove dust, fingerprints, or oil.
A clean lens gives your product photos sharper detail and a more professional look—no Photoshop required.
Combine these tips with a steady hand (or tripod), a white background, and some thoughtful composition, and you’ve got everything you need to create polished, scroll-worthy product images.
Turn Your Merch Into a Full-On Brand with Fourthwall
Your designs deserve more than just a basic product listing.
With Fourthwall's photorealistic mockup generator, you can instantly create pro-level product images featuring flat lays, lifestyle backgrounds, or real models. No photoshoots, no editing software, and no stress!
And now you can give your product photos the attention they deserve with our new product page templates.
Create personal pages that showcase each product with testimonials, reviews, videos, and embedded content, all styled to match your brand.
Whether you’re selling hoodies, digital downloads, or exclusive content, every page becomes an experience your fans won’t forget.
So, if you're ready to launch smarter, sell faster, and actually grow your brand, sign up with Fourthwall today and get ready to take your merch to the next level!
FAQ: Taking Great Product Photos For Your Store
Can I use Fourthwall mockups instead of real photos?
Absolutely. Fourthwall’s photorealistic mockups are designed to look like professional studio photography, complete with clean backgrounds, accurate lighting, and realistic shadows.
You can choose between flat lays, lifestyle settings, and model photography, making them perfect for launching your eCommerce store or updating your product images without the hassle of a whole photo shoot.
Do I need a DSLR to take good product photos?
Not at all. Today’s smartphones have high-quality cameras that, when paired with good lighting, steady framing, and simple editing tools like Lightroom or Photoshop, can produce product photography that rivals DSLR shots.
Focus on using natural light, locking your camera settings, and capturing multiple angles to get the best possible photos without expensive gear.
What are the best apps for editing product photos?
Some of the best apps for editing product photos include Adobe Lightroom, Canva, and Snapseed, all of which offer powerful yet beginner-friendly tools for photo editing and color correction.
Lightroom is ideal for adjusting lighting, contrast, and shutter speed effects, while Canva excels at adding text, branding, or clean white backgrounds for ecommerce listings.
For mobile creators, Snapseed and VSCO provide quick retouching and photography lighting fixes that make your product images look studio-quality without needing a professional photographer.
How can I make my product photos stand out?
In order to make your product photos stand out, focus on clean, well-lit product photos shot against a white background or a minimal setting that highlights your design.
Use a proper camera, lightbox, or diffuser to balance lighting and avoid harsh shadows, then enhance your images with subtle photo editing or retouching for a polished finish.
It doesn’t matter if you’re shooting in a studio or at home, paying attention to camera settings like aperture and shutter speed can make even simple ecommerce photos look professional and high-quality.
What’s the best background for merch photos?
A white background is one of the most effective choices for a product photograph. It keeps your product front and center while creating a clean, professional look.
Whether you're shooting on a paper roll, foam board, or inside a lightbox, a neutral background makes editing easier and reduces distractions.
For lifestyle or branded shots, try soft-colored backgrounds or textured surfaces that complement your merch without overpowering it.
About the Author